Products
What can I produce with teknow?
Here you can find manufacturing examples from the community – these workpieces were produced by other users with teknow.
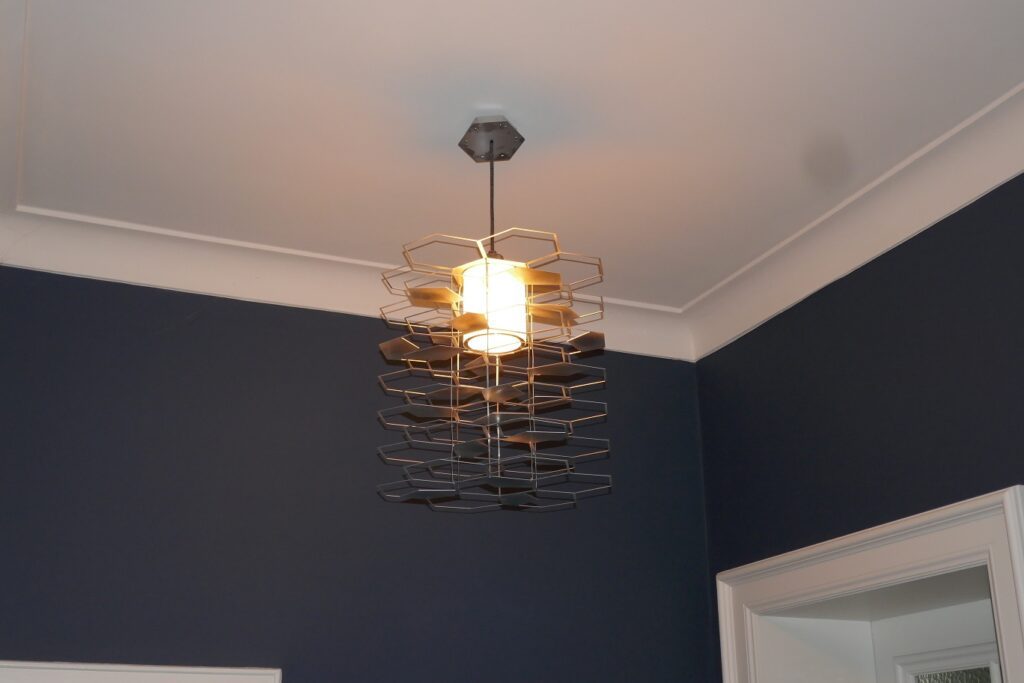
- ceiling light
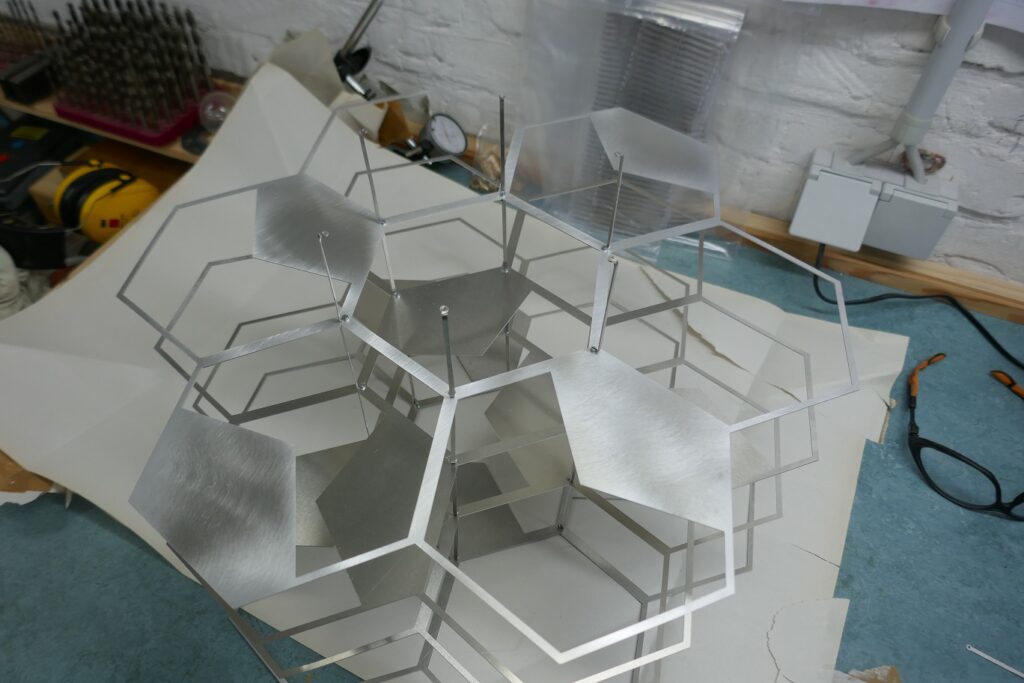
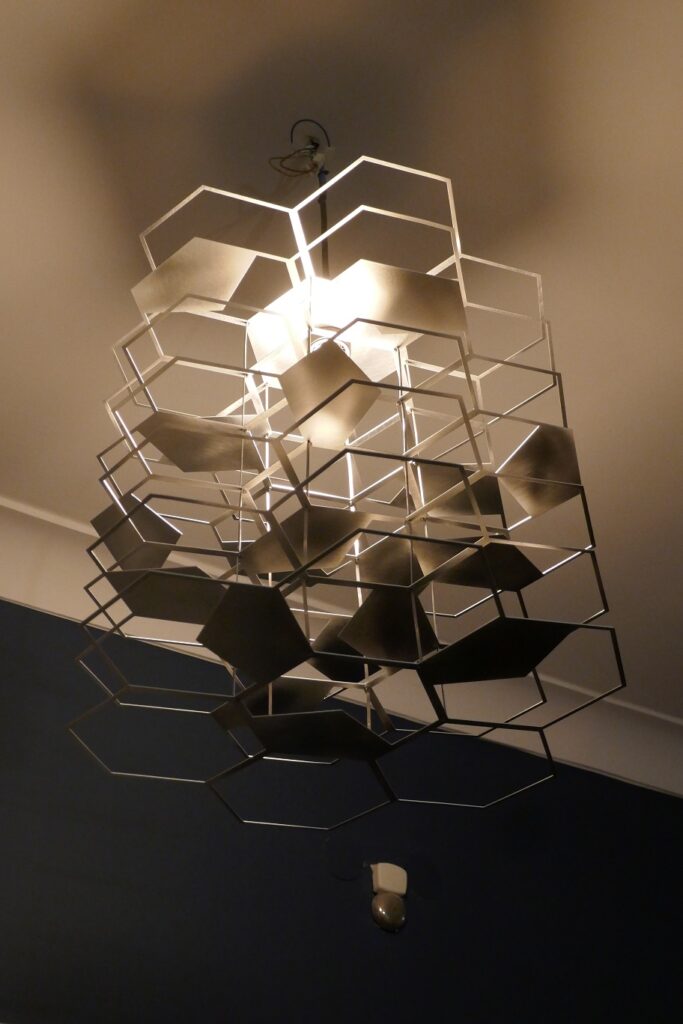
The lamp consists of several levels of thin aluminum sheets, part of which is filled with pentagons. All levels placed one on top of the other result in seamless packaging. To tile the plane with pentagons: https://en.wikipedia.org/wiki/Pentagonal_tiling Type 3 by K. Reinhardt (1918) is used here. Three pentagons put together form a hexagon.
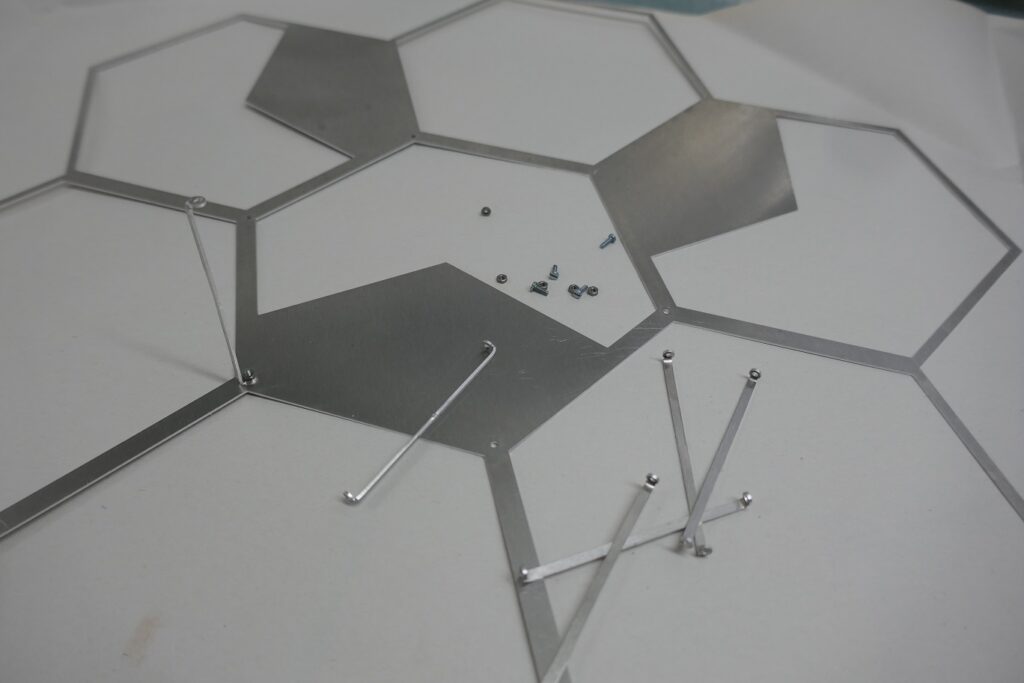

Left: Start of construction: The spacers are bent and mounted on the levels.
Right: The additional levels are always assembled so that the added pentagons cover the gaps in the levels below.

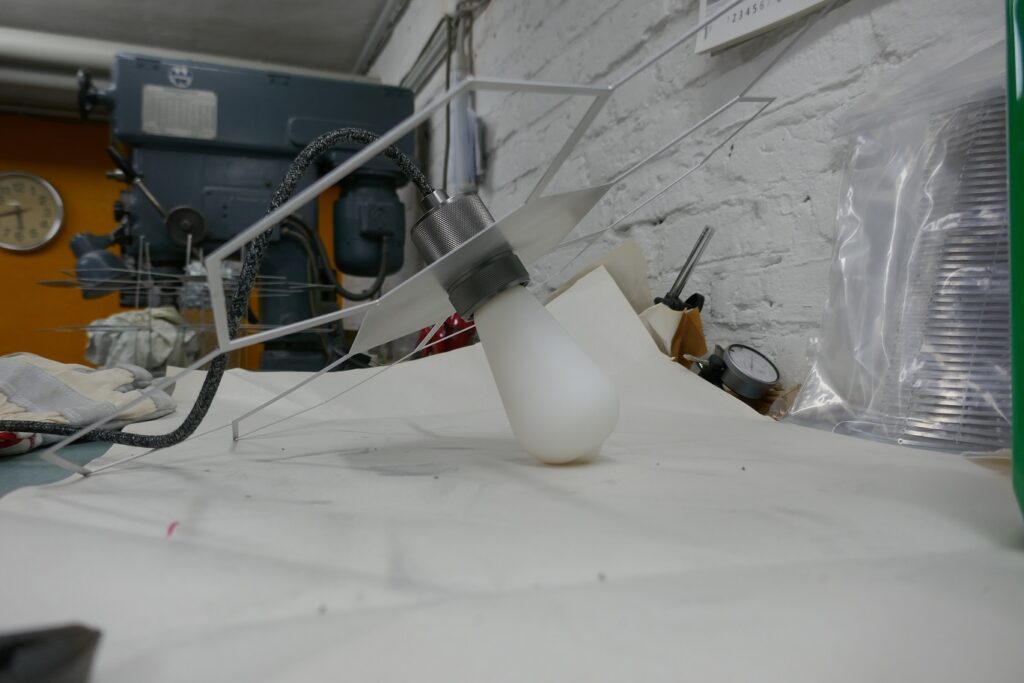
Left: The top level is provided with a socket for the lamp.
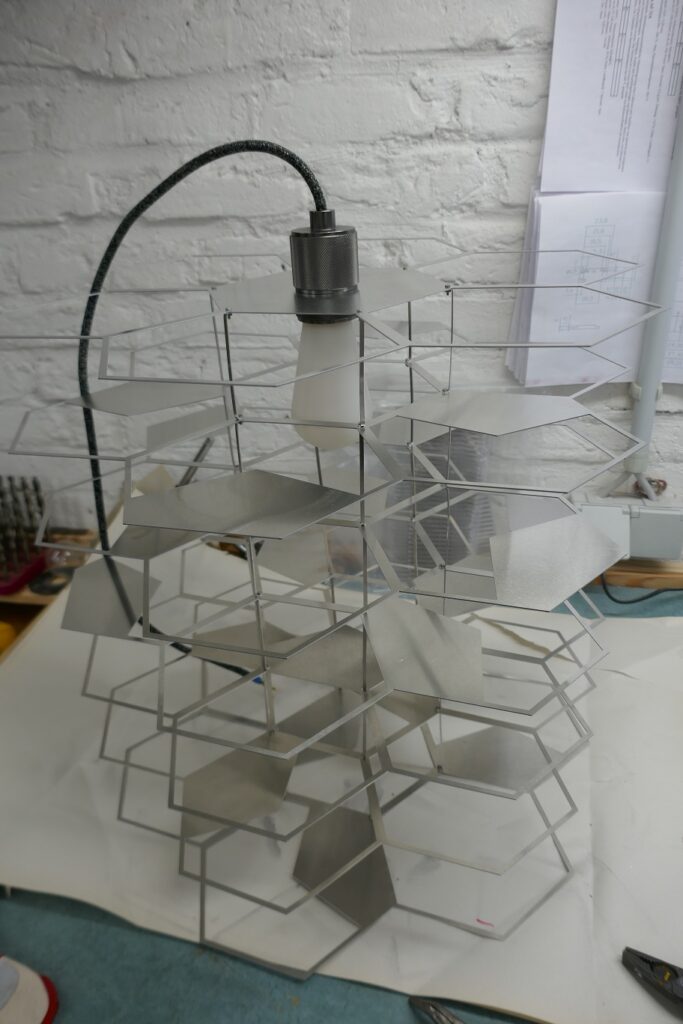
Right This is what the finished lamp body looks like.

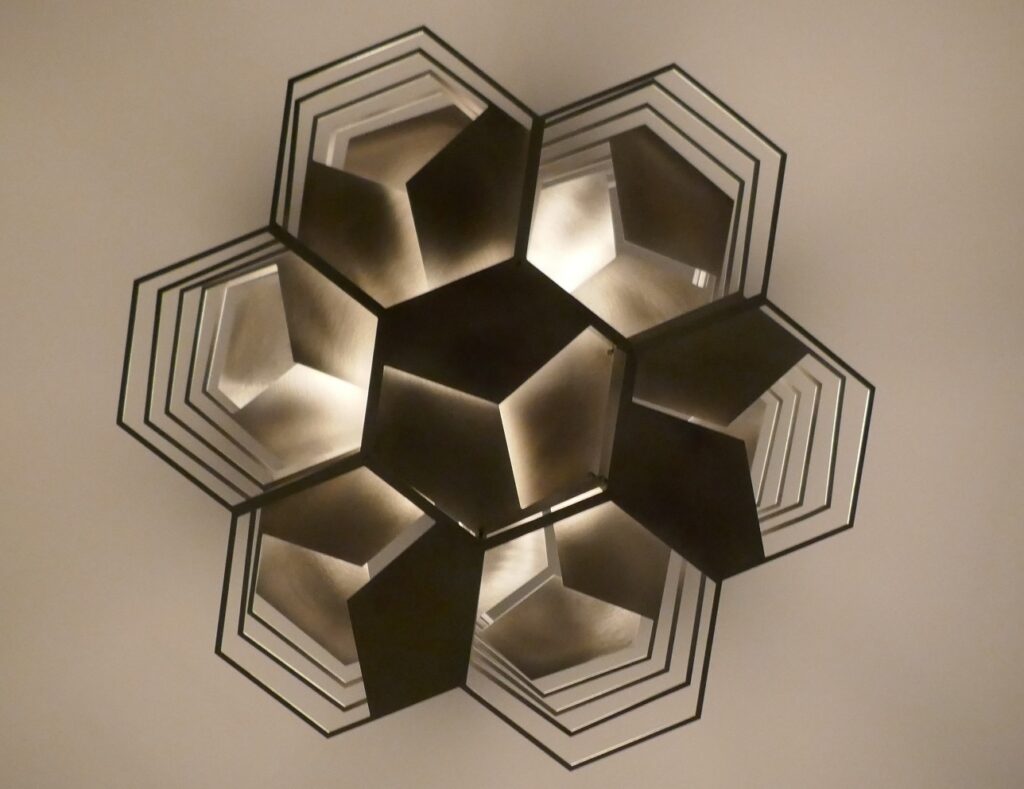
Left: View from below: the pentagons of the different levels tile the entire area. Depending on the height at which they are located, they are illuminated to varying degrees.
Right: View from the side.
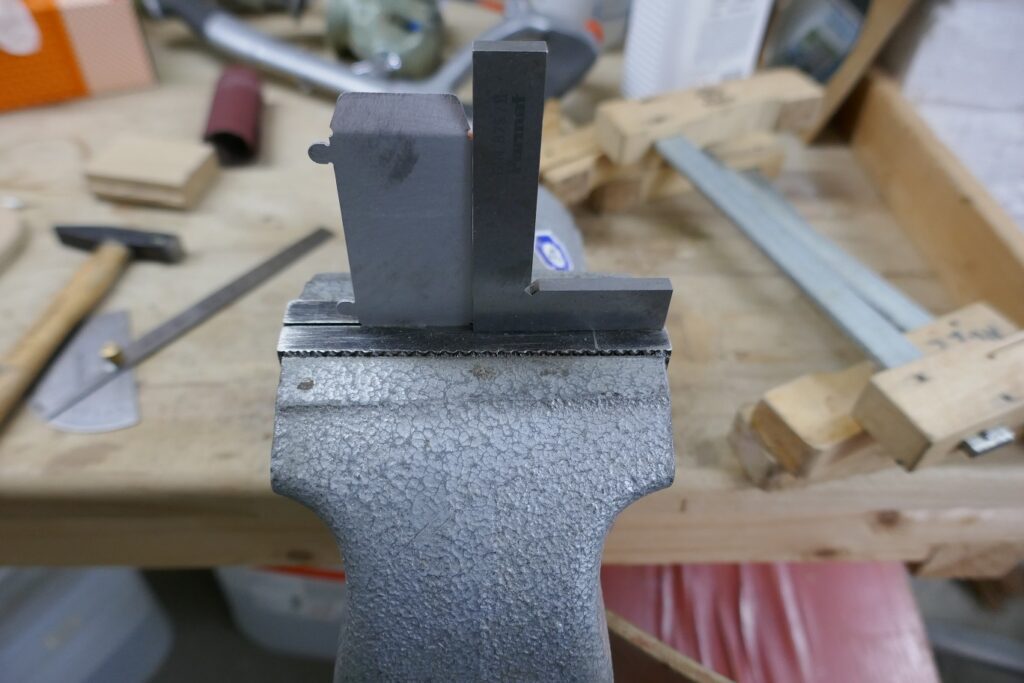
The next element for the lamp is a hexagonal crown for connection to the ceiling. This is also built from aluminum sheets. The connections are made using bent tabs, like those used on tin toys. Here one of the three side walls is bent by 60° in the vice.
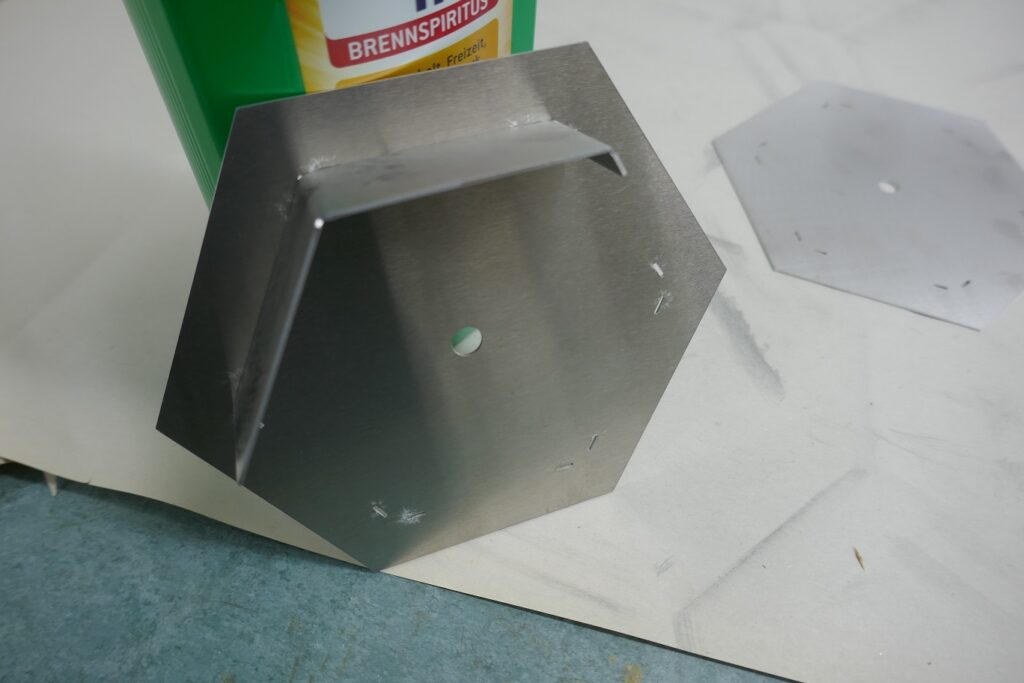
The folded side walls are placed on the base plate.
The tabs on the underside are then carefully bent over.
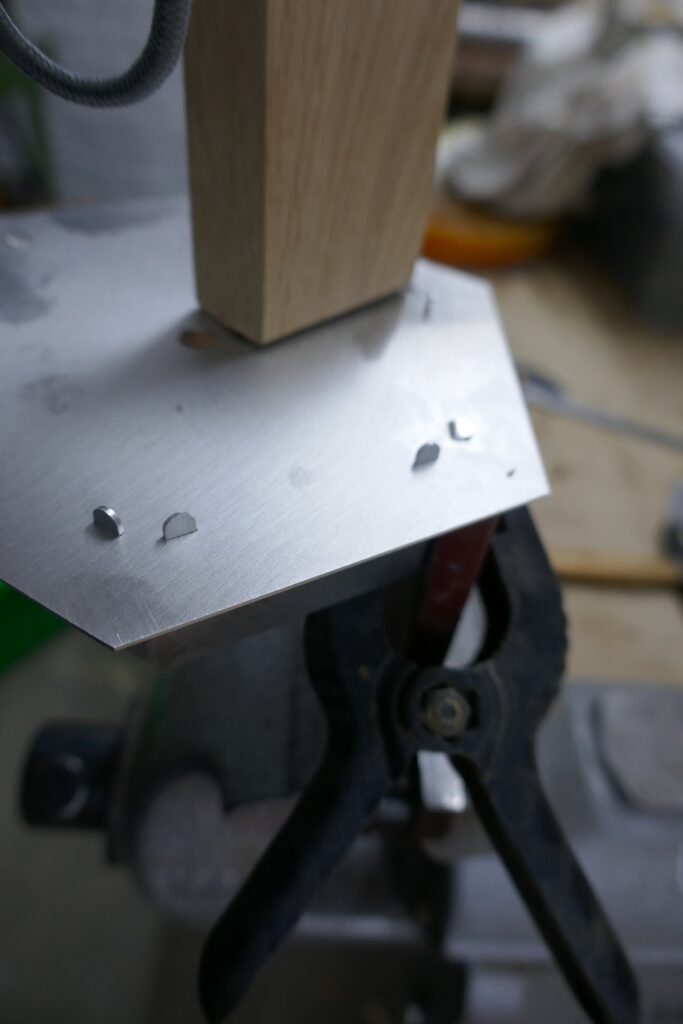
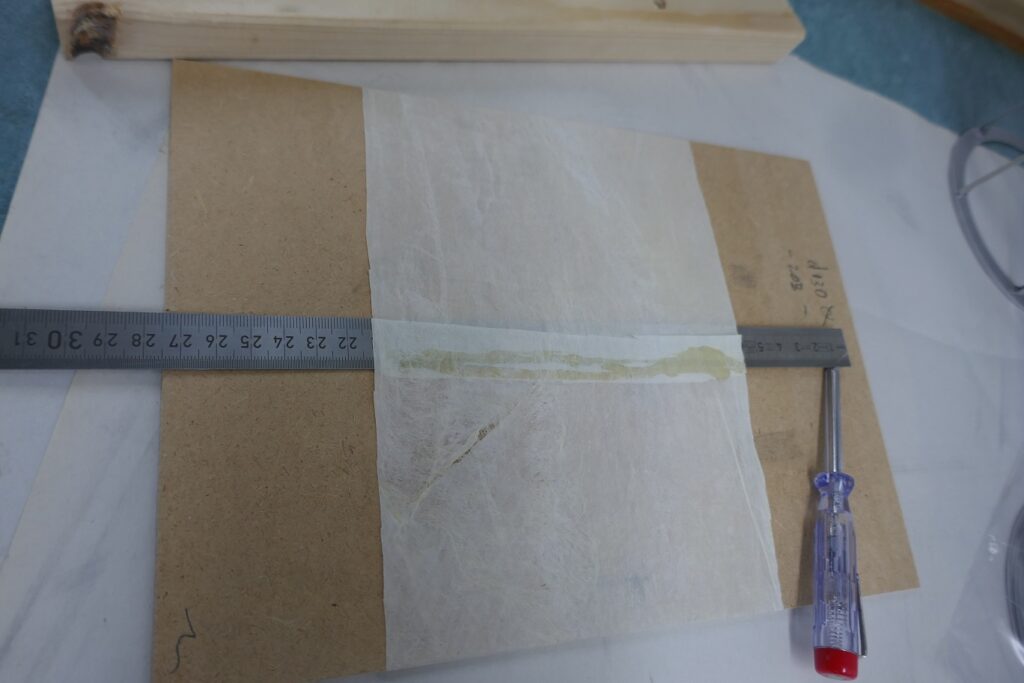
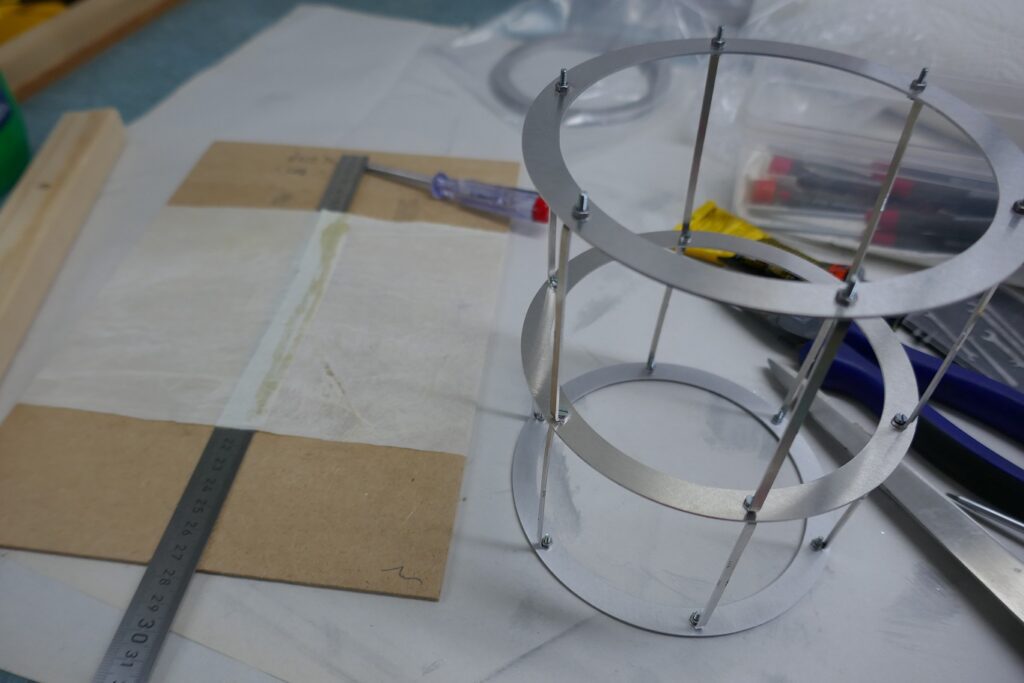
This is followed by an interior lantern. It surrounds the lamp in a cylindrical shape. Here you can see the basic framework, assembly again exactly as with the levels via the connecting bars.
The cover of the inner lantern is made of gold beater skin. The combination of the materials aluminum and gold beater skin was used in airship construction at the beginning of the 20th century. The skin (consisting of the outermost layer of skin from the bovine cecum) was one of the few lightweight materials impermeable to hydrogen.
This is what the second example looks like, with an inner lantern and ceiling crown.
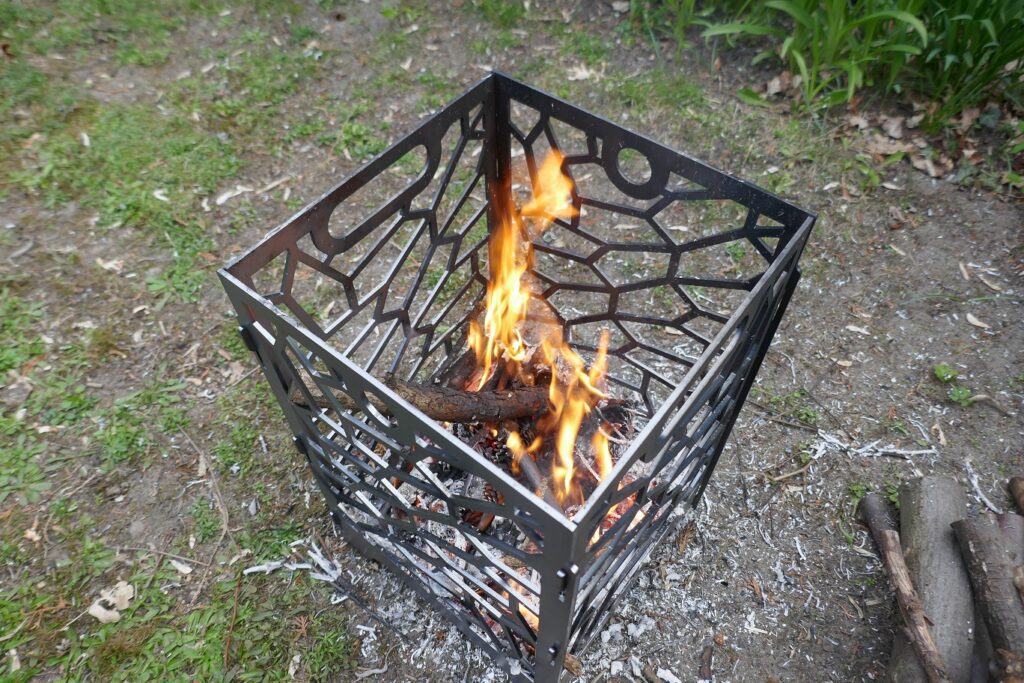
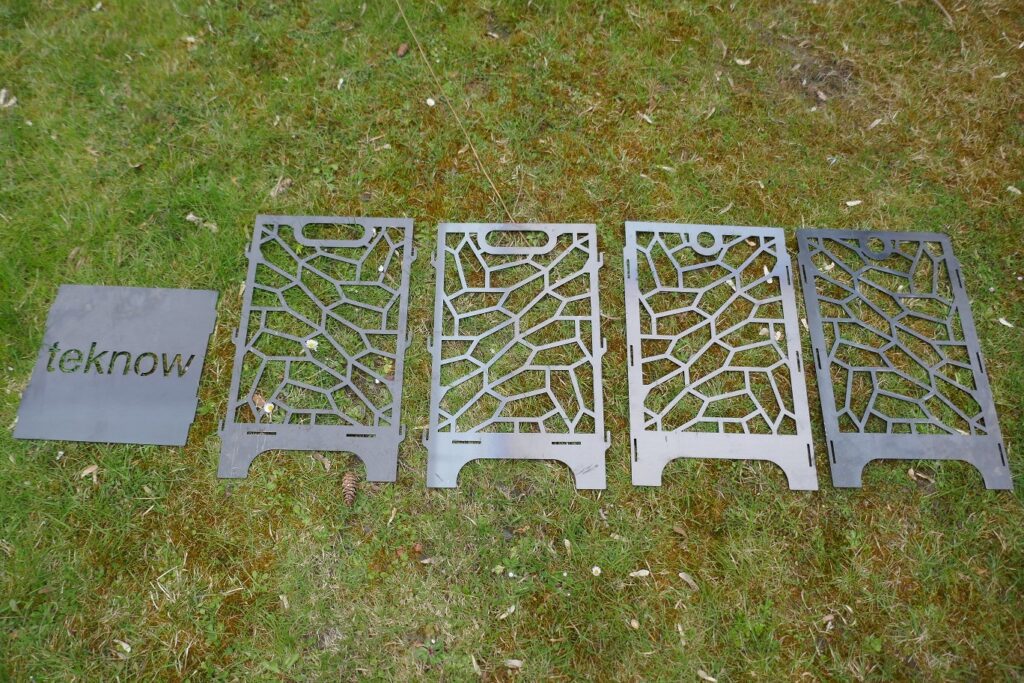
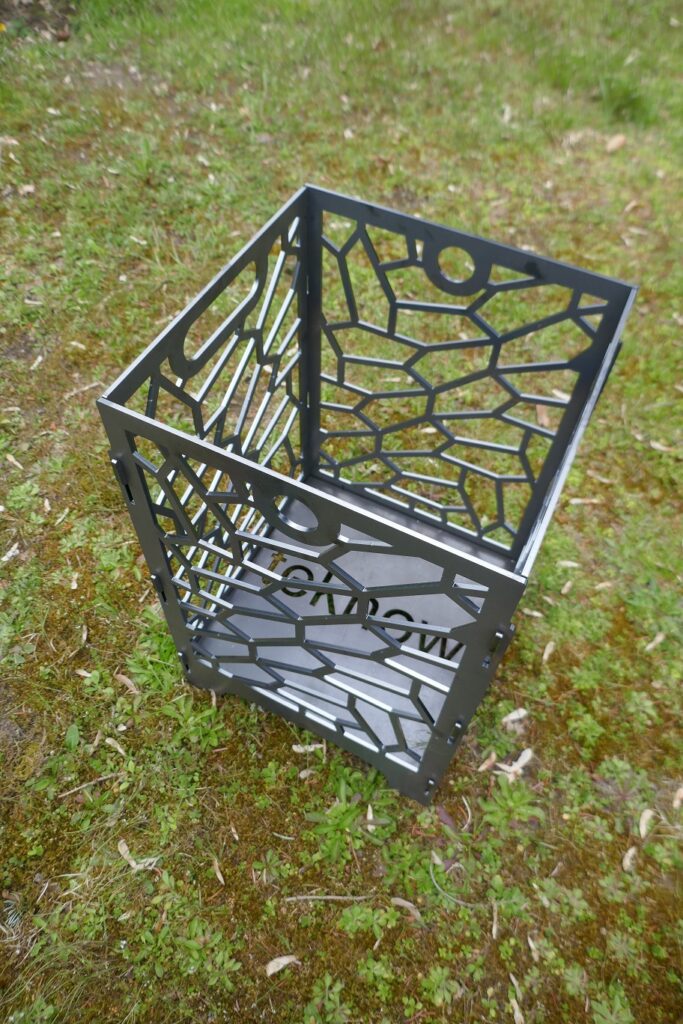
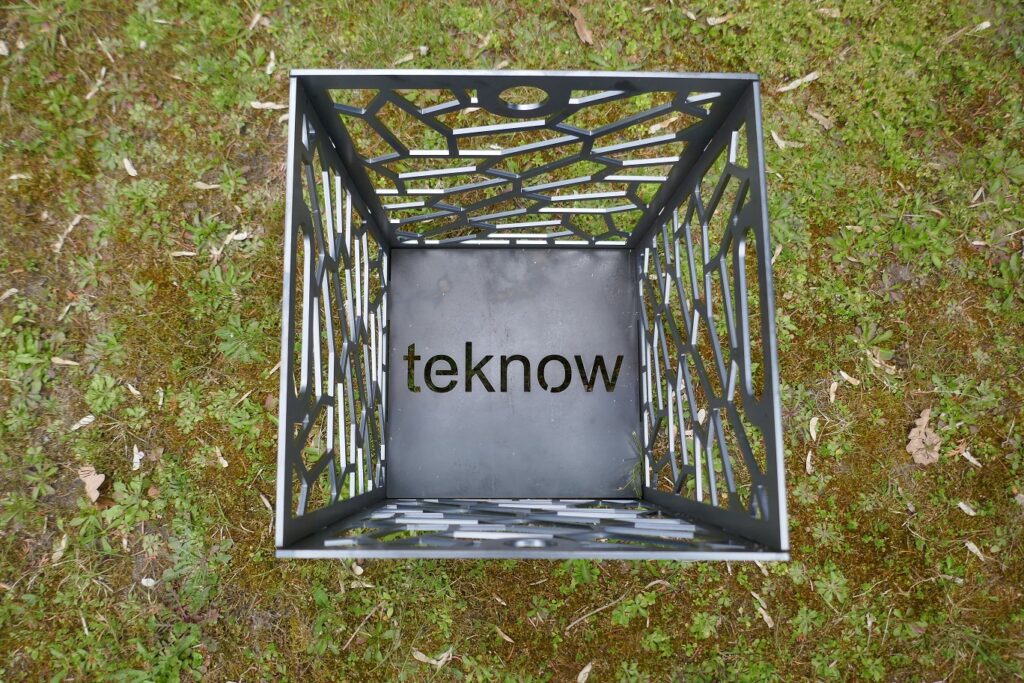
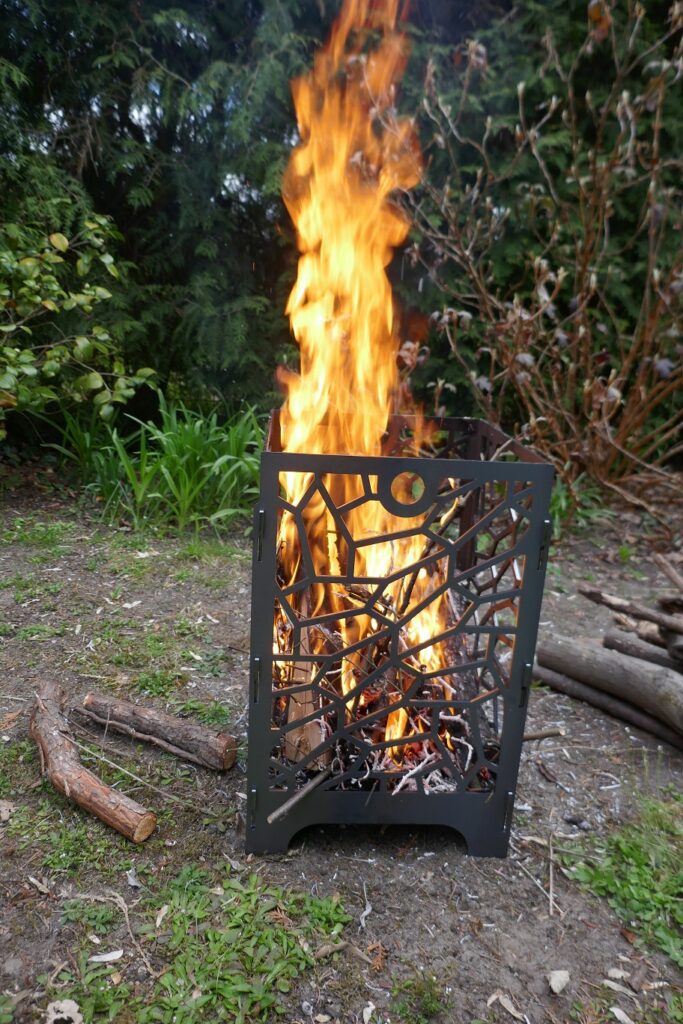
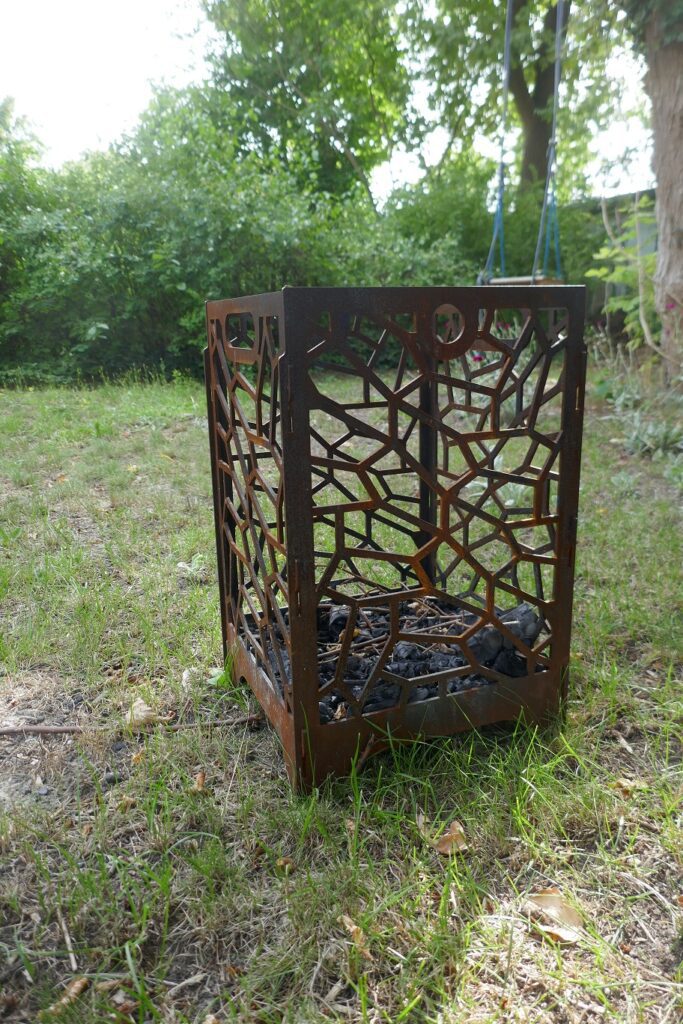
- Fire basket made from laser parts
An individual fire basket for the garden can be created with laser parts. This is a fairly open, plug-together design.
The base area of the fire basket is 300 x 300 mm² inside, height 500 mm, material Corten steel 4 mm thick. The side panels have pentagonal recesses. For tiling see: https://en.wikipedia.org/wiki/Pentagonal_tiling
The design uses the 15th type, a 12 tile pattern.The fire basket consists of 5 parts that fit together without tools. It can be dismantled and stored to save space, for example in winter.
In use:
After some time outdoors, the patina typical of Corten steel forms:
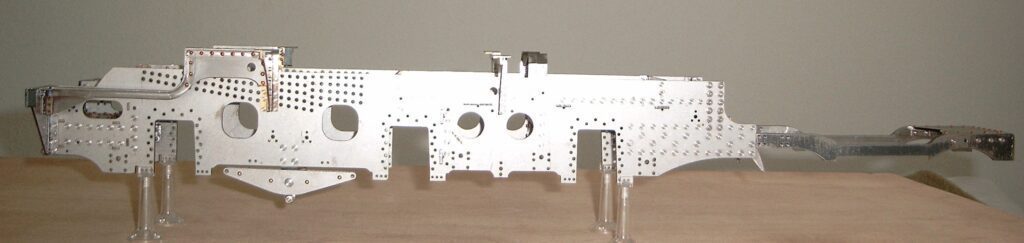
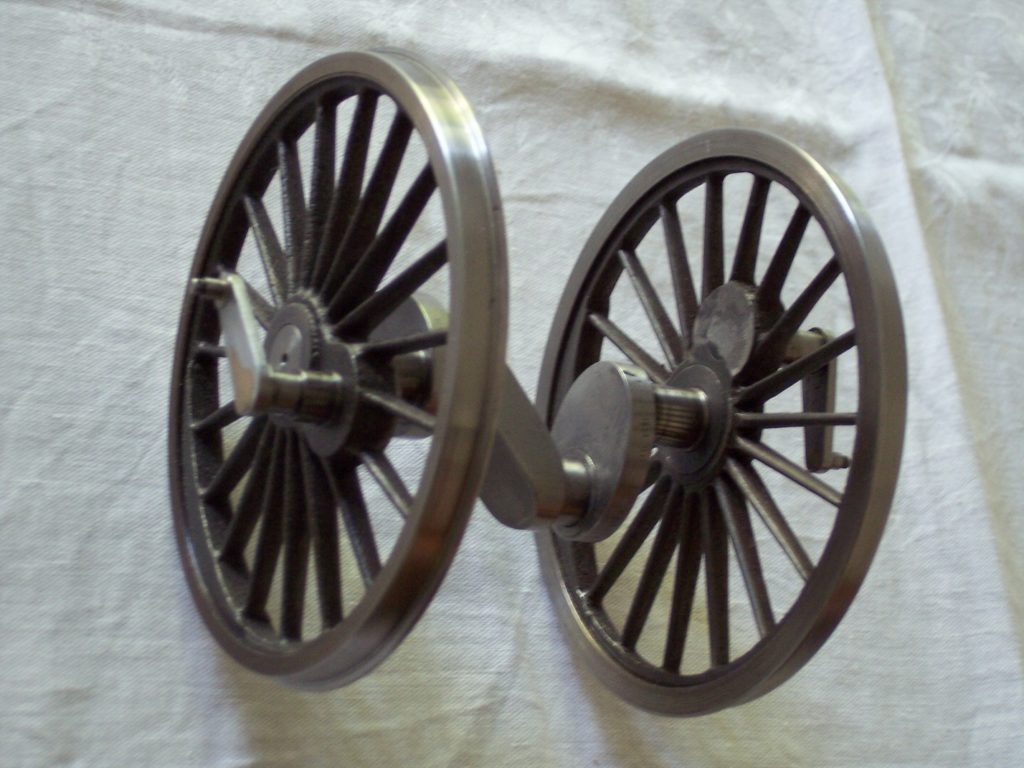
- Plate frames and more than laser parts for Live Steam
Plate frames, frame stretchers and other parts for locomotive models can be ideally produced using laser cutting. Of course, what has been said applies just as much to other types of drive, such as battery-powered models.

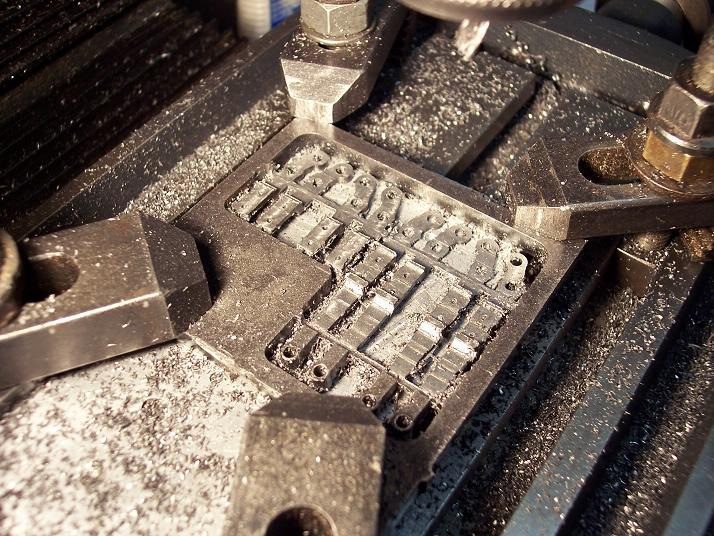
The example shows the plate frame of a model pr. S 10 in 1:16 scale. All holes were lasered out at the same time, along with tenons and slots in some places for precise alignment of the plates. The frame is 3 mm thick, the shoeed bar frame consists of 10 mm thick sheet metal that has been further processed by milling. The curved beams, the consoles and the balancing levers were also created using laser parts.

The detailed image shows the frame stretchers using sheets that are riveted and screwed together using angle frames.
The blanks for the angle frames and the boiler support are made of 6 mm sheet metal, and the angles were then made by milling. Parts of the same thickness were each grouped together by webs. This is usually cheaper. For parts that are to be further processed by milling, this simplifies clamping if the arrangement is appropriate.
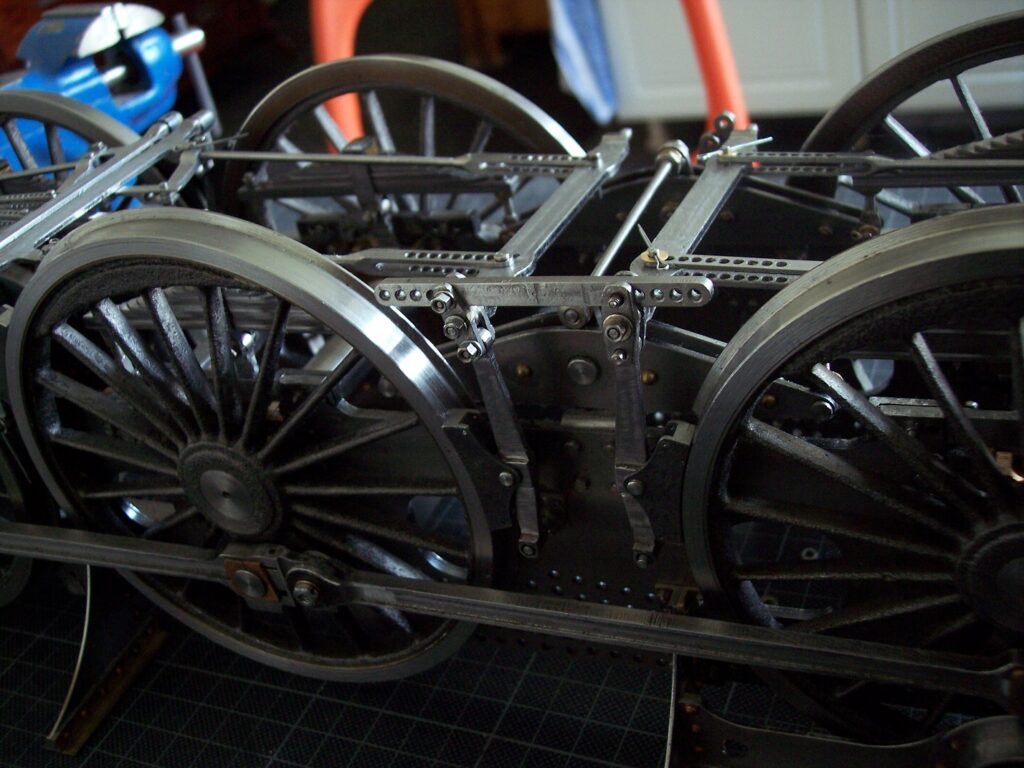
The drawing shows the outer and inner connecting rods combined into a block, as well as the locks of the inner connecting rod heads.
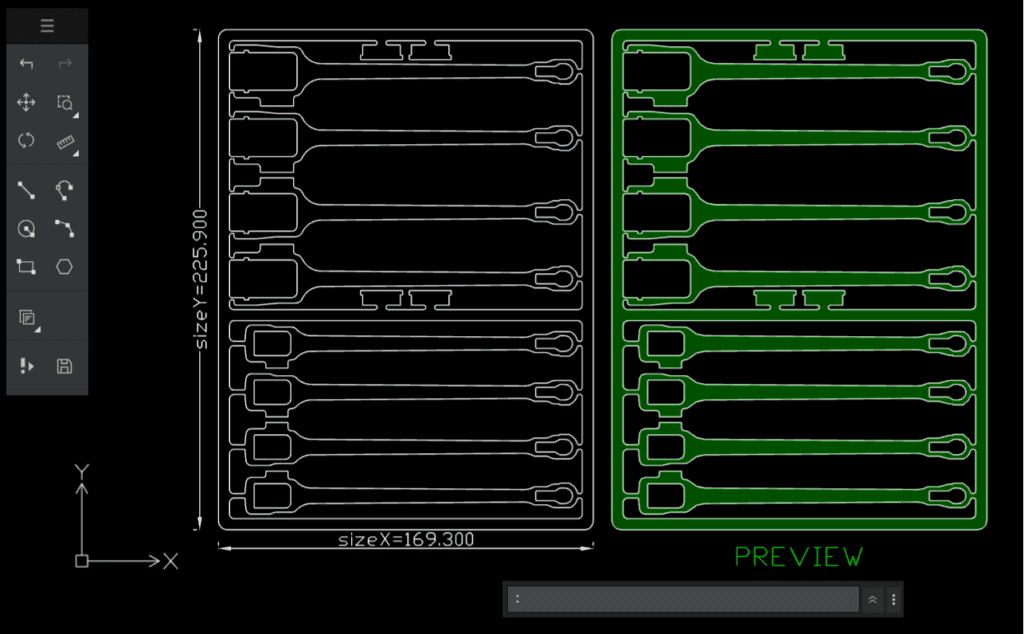
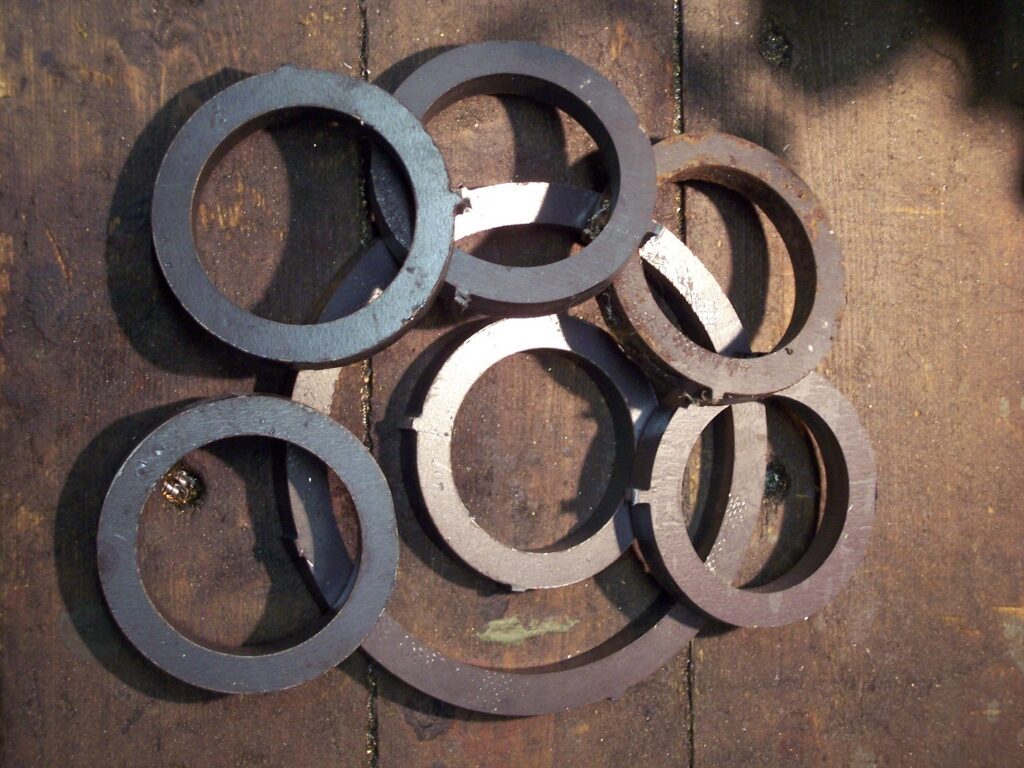
The blanks for many other parts of a live steam model can also be easily produced using laser cutting. Here are some examples.


Left: The blanks for the wheel tires are made of 10 mm steel.
Middle: The blanks for the drive and coupling rods as well as the valve gear parts can be arranged in a grid so that they are easier to clamp on the milling machine for finishing. The picture shows the assembled combination levers being finished on the milling machine.
Right: Brake blocks, brake levers and compensation beams based on laser blanks.
- Spark protection plate made of black steel
This surface finish is also known as a scaled surface. Spark protection plates are available here as individual cut pieces with any contour – there is also a solution for complicated installation geometries.
Why do you need a spark protection plate?
If the floor on which the fireplace or stove is located is not fireproof, a non-combustible base is required. This prevents sparks falling out when adding firewood from starting a fire. A nice material for such a base is untreated black plate. With the teknow designer you can cut the sheet metal individually, with any contour and cutouts, e.g. for the air supply. This means that the sheet metal can be precisely adjusted even in difficult cases, such as walls and projections that are not at right angles.
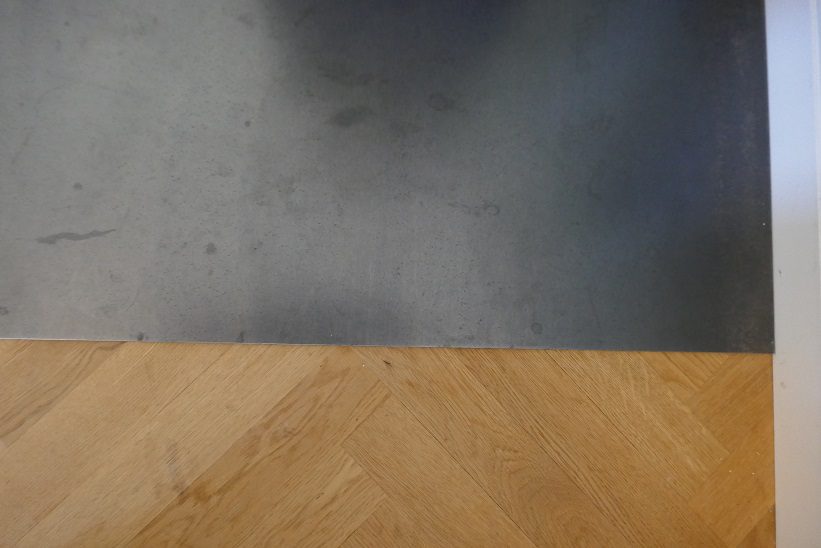
What is Black plate?
Black plate is a non-descaled heavy steel plate (from 3 mm thick). The “scale”, the iron oxide on the surface, is created when the glowing sheet is rolled. A lively gray to blue surface color is created. Each sheet has an individual color structure. The surface has a metallic shimmer rather than a shine.
The sheet metal may have slight scratches due to transport, production and cutting, especially on the underside due to being placed on the laser machine. It is therefore important to create the drawing correctly. Since the surface color is a by-product of the production process, a guarantee for a specific appearance is not possible.That is how it works:
The spark protection plate must cover the areas at risk of fire by 300 mm on the side and 500 mm on the opening side in front of the oven. If the oven can be rotated, this must be taken into account accordingly. If in doubt, ask the chimney sweep, who will also inspect and accept the system at the end.
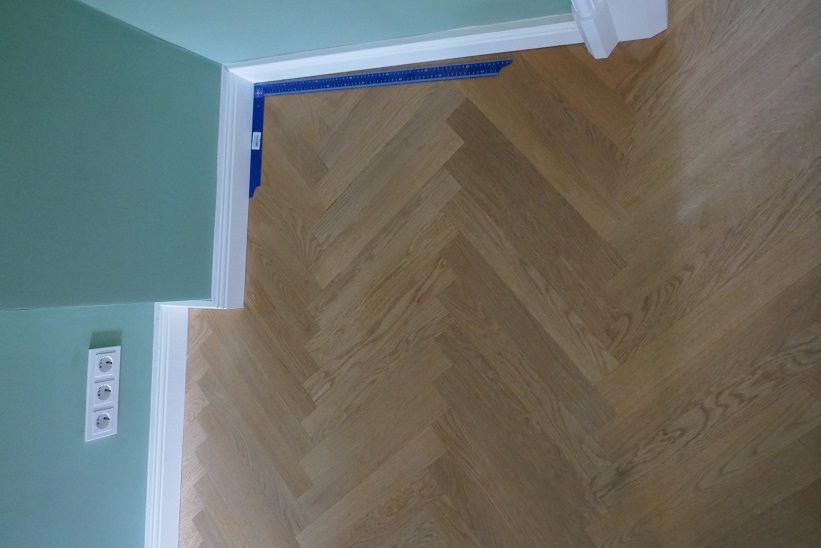
Then it’s best to make a hand sketch of the plate. To do this, select a suitable corner as the zero point and enter the dimensions from there on in mm. In most cases this is very easy. Here is an example of a more difficult case.
This is what the corner looks like. The walls are not exactly at right angles. The oven has a footprint of 350 x 350 mm², so the plate would have to be 950 mm wide. The wall at the top of the picture is only 850 mm long – so you have to avoid the base of the door frame.
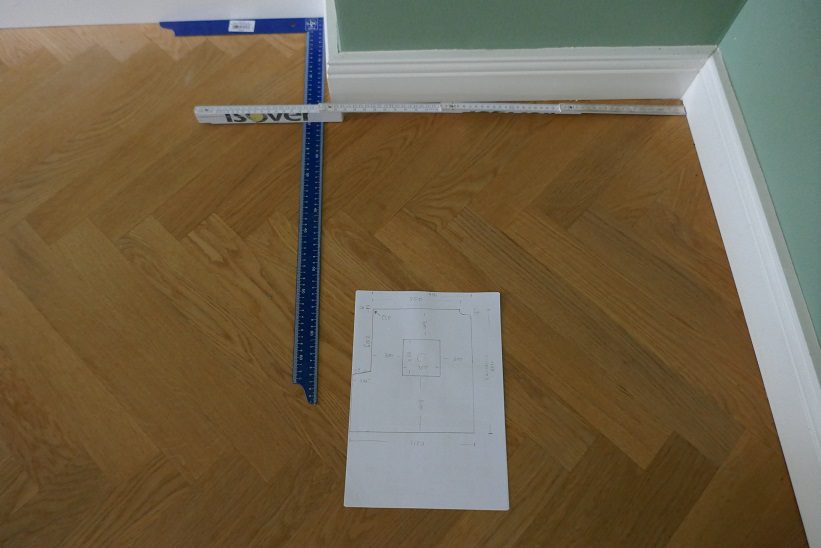
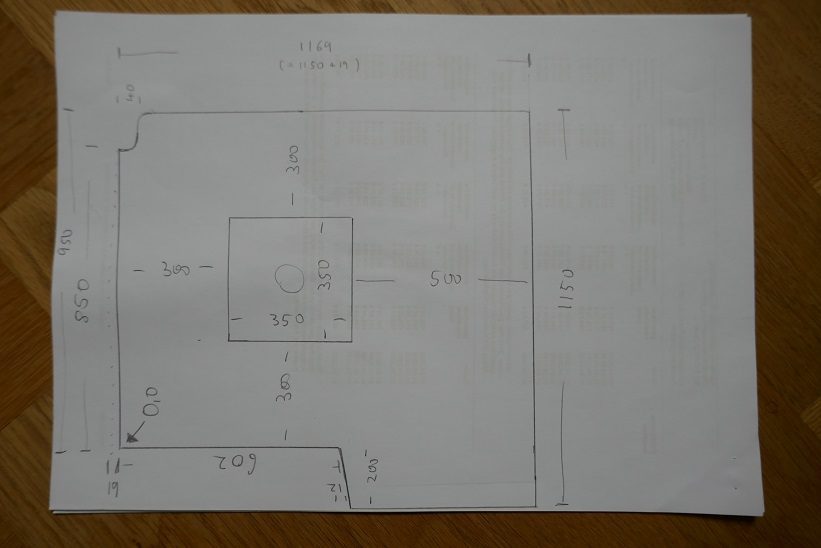
First we carefully measure the corner and make a paper sketch. I used the back right corner as the zero point. All dimensions are given in mm.
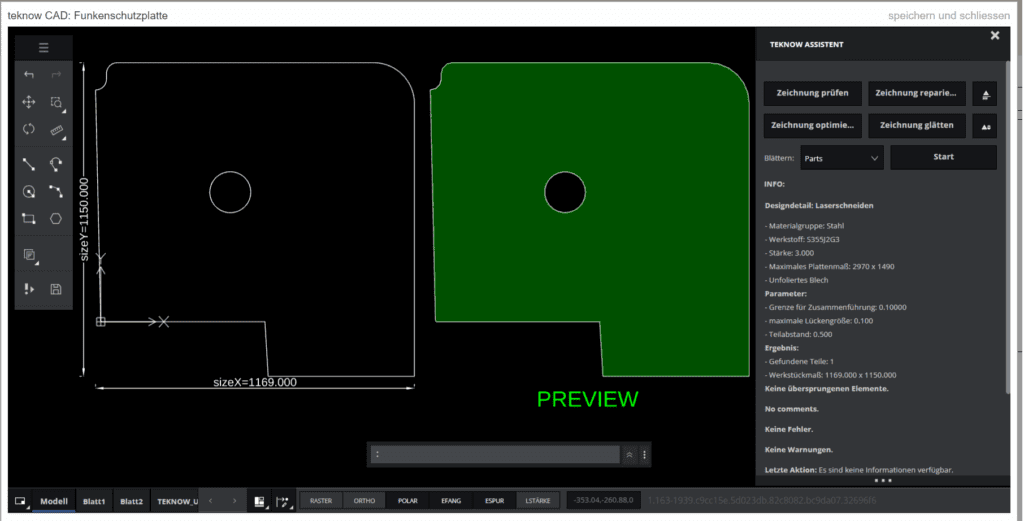
Then you transfer the sketch to teknow CAD. How to do this is explained in detail in the help and videos.
Note: When selecting the material, select one of the scaled surface variants. The sheets in the same material are also available as pickled and oiled – then the scale layer is removed and the surface is bare.

The view is rotated 180° compared to the images above because the origin of the drawing area is at the bottom left.
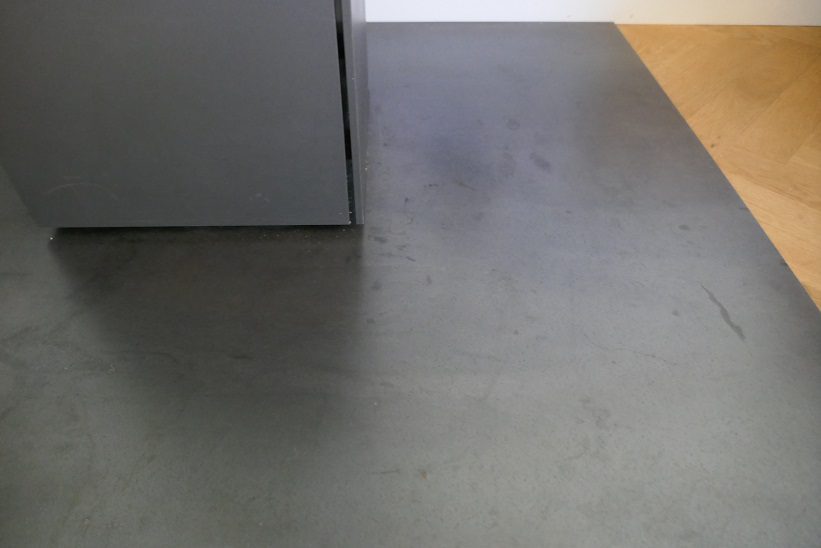
After delivery:
Now you have a self-designed spark protection plate with an individual surface color. So that you can enjoy the plate for a long time, we recommend that you keep a few things in mind. Black plate rusts when it gets wet. It can be used indoors untreated as long as it does not come into contact with water. After delivery, you should check the edges and, if necessary, round them with some sandpaper, then clean the sheet once – simply wipe with a sponge or cloth, warm water and dishwashing liquid. Then dry the sheet thoroughly, especially the cut edges. The sheet metal can be oiled or varnished, perhaps adapted to the floor material, such as oiled or varnished parquet. Apply the oil (e.g. linseed oil, Ballistol) very thinly and allow to dry. Can be painted with an acrylic clear coat for metals (semi-matt, not water-based). The painted surface will be more sensitive to glowing pieces of coal than the oiled one.
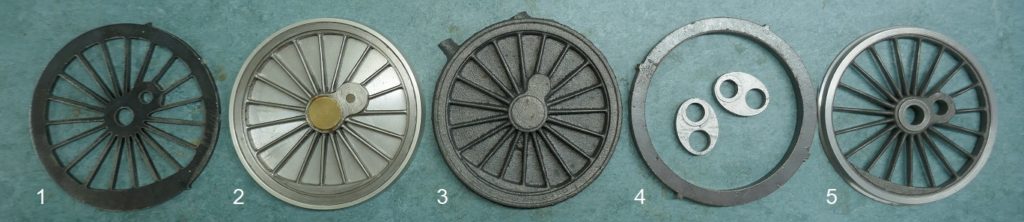
- Wheel pattern from laser parts
I made wheel pattern for a 1:16 scale locomotive model of the Prussian steam express train locomotive S10. The pattern for the spokes was realized as a laser part. The wheel tires and the webs of the crank axle are also laser parts.

The pictures show the production sequence:
1. Lasered wheel spider for the cast model. The lintel is made on the milling machine and the spokes are then filed into shape.
2. Assembled casting model, for molding in sand.
3. Cast blank, this is shaped by turning.
4. Lasered blank for the wheel tire. This is shrunk onto the wheel center. In the middle the lasered blanks for the webs of the crank axis.
5. Fully assembled wheel with profiled running surface.This is what the fully assembled crank axle looks like, with pressed-in drive pins and a hard-soldered counter crank.